Single Sign On Support
FogLAMP Manage supports the integration of the external authentication authorities to enable single sign on within an organisation. The mechanism that FogLAMP Manage uses to support single sign on is OAuth2. A number of OAuth2 providers have been integrated and tested with FogLAMP Manage. In this section of the documentation we will detail how to configure FogLAMP Manage to use these different providers.
Multiple providers may be configured, giving the user to choice of which provider to use when they connect to FogLAMP Manage.
When a new user, who has not previously used FogLAMP Manage, authenticates via one of these providers, a new user within FogLAMP Manage is created for that user. This new user is granted a minimal set of rights, as a user who is only able to view the configuration within FogLAMP Manager. In order to grant that user higher levels of privileges an administrator level user must change the role for the newly created user.
OAuth2 Configuration
FogLAMP Manage uses OAuth2 as a mechanism for integrating external authentication systems. Adding a new OAuth2 authenticator to FogLAMP Manage requires the configuration of a number of URL’s and other information in FogLAMP Manage.
To add a new OAuth2 provider to FogLAMP Manage click on the OAuth2 Provider menu item in the menu on the left of the FogLAMP Manage user interface.
|
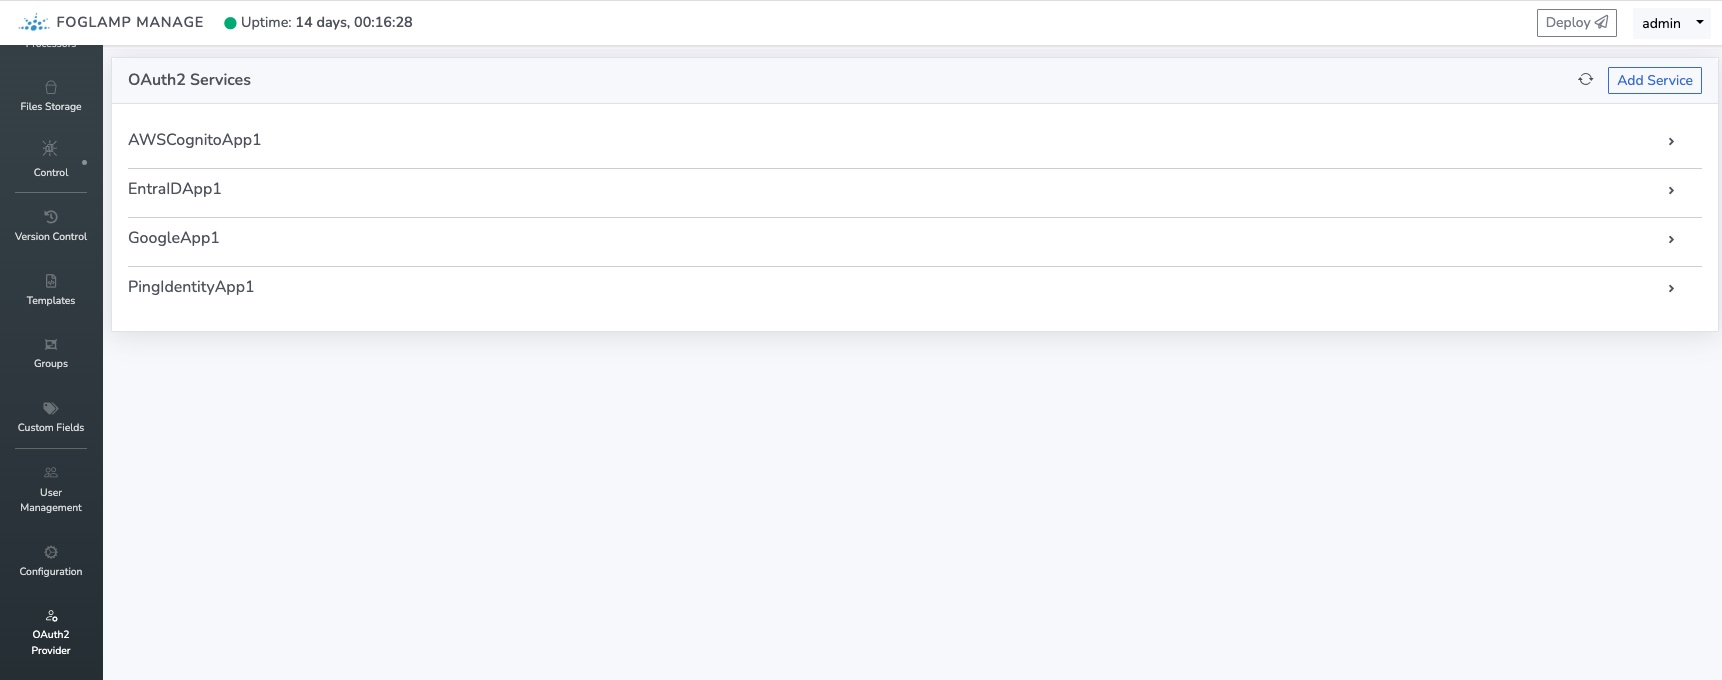
A screen is then shown that displays all providers that are currently configured. Using this screen allows the user to manage the providers already configured or add new providers.
To add a new provider service click on the Add Service option on the screen that is shown. A new screen will appear with a drop down list of supported providers.
|
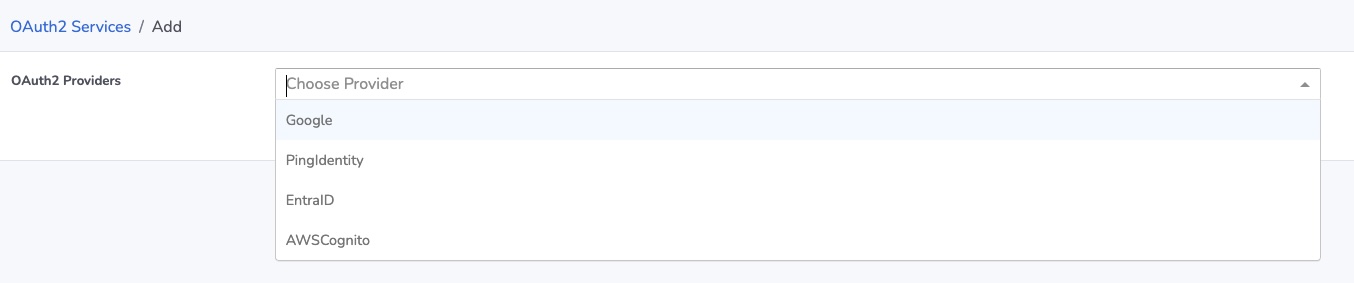
Select the provider you wish to add from this list. You will then be presented with a screen specific to the provider you selected. The sections below detail the use for each of the different providers that are supported.
AWS Cognito
A number of steps need to be taken in AWS before FogLAMP Manage can use Cognito as an OAuth2 provider. Navigate to your AWS Cognito home page.
Edit an existing pool or create a new one for FogLAMP Manage to use.
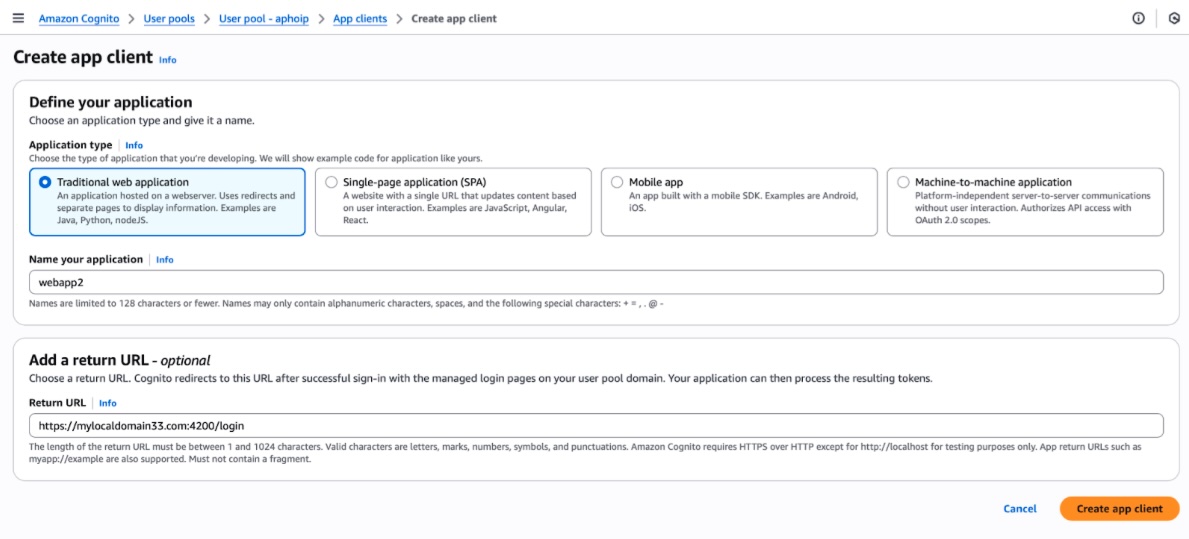
Add a new application, the type of which is Traditional web application
Set the application name to be the name you wish FogLAMP Manage to be known as in Cognito.
Set the Return URL to the URL of the FogLAMP Manage login page, e.g. https://foglampmange.dianomic.com:4200/login
Set the SignOff URL to the URL of the FogLAMP Manage login page, e.g. https://foglampmange.dianomic.com:4200/login
The OpenID Connect scopes should include openid and mail.

When adding a new AWS Cognito provider to FogLAMP Manage a dialog will be presented to the user that populates the various URL and other setting needed to connect to Cognito.
|
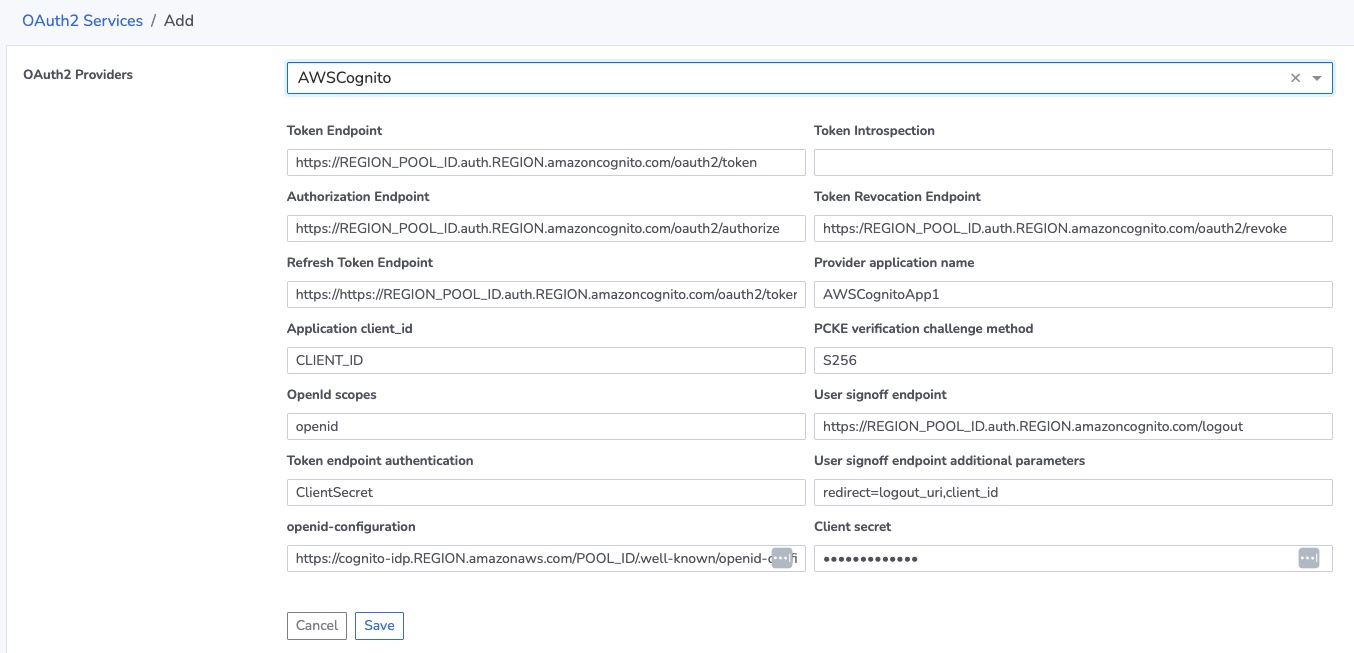
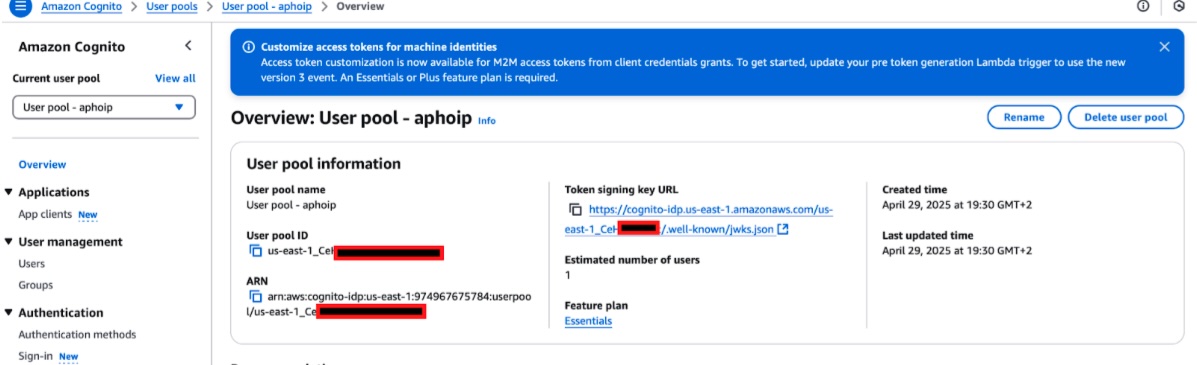
The URLs shown in the examples should be substituted with data from the pool you created or used in the AWS page.
USER_POOL_ID - This is the name of the pool as shown in the Overview page for your AWS Cognito Pool.
- The Token signing key URL, includes the region anf USER_POOL_ID:
We need to modify the value by replacing ‘/jwks.json’ with ‘/openid-configuration’ The URL, as an example ‘https://cognito-idp.SOME_REGION.amazonaws.com/USER_POOL_ID/.well-known/openid-configuration’, points to OpenId configuration with all the URLs to substitute in the FogLAMP Manage configuration.
Note: the token_endpoint in the JSON configuration has to be addded in both ‘Token Endpoint’ and ‘Refresh Token Endpoint’
In addition two items must be filled with information available from the pool, these are
Provider application name - The name of the application you created when you defined your new application in Cognito.
Application client_id - The ID obtained from the pool Application page.
Client secret - Again taken from the pool Application page.
Microsoft EntraID
A number of steps need to be taken in Microsoft Entra ID before FogLAMP Manage can use Entra as an OAuth2 provider. Navigate to your Microsoft Entra home page.
Either create a new tenant or use an existing tenant
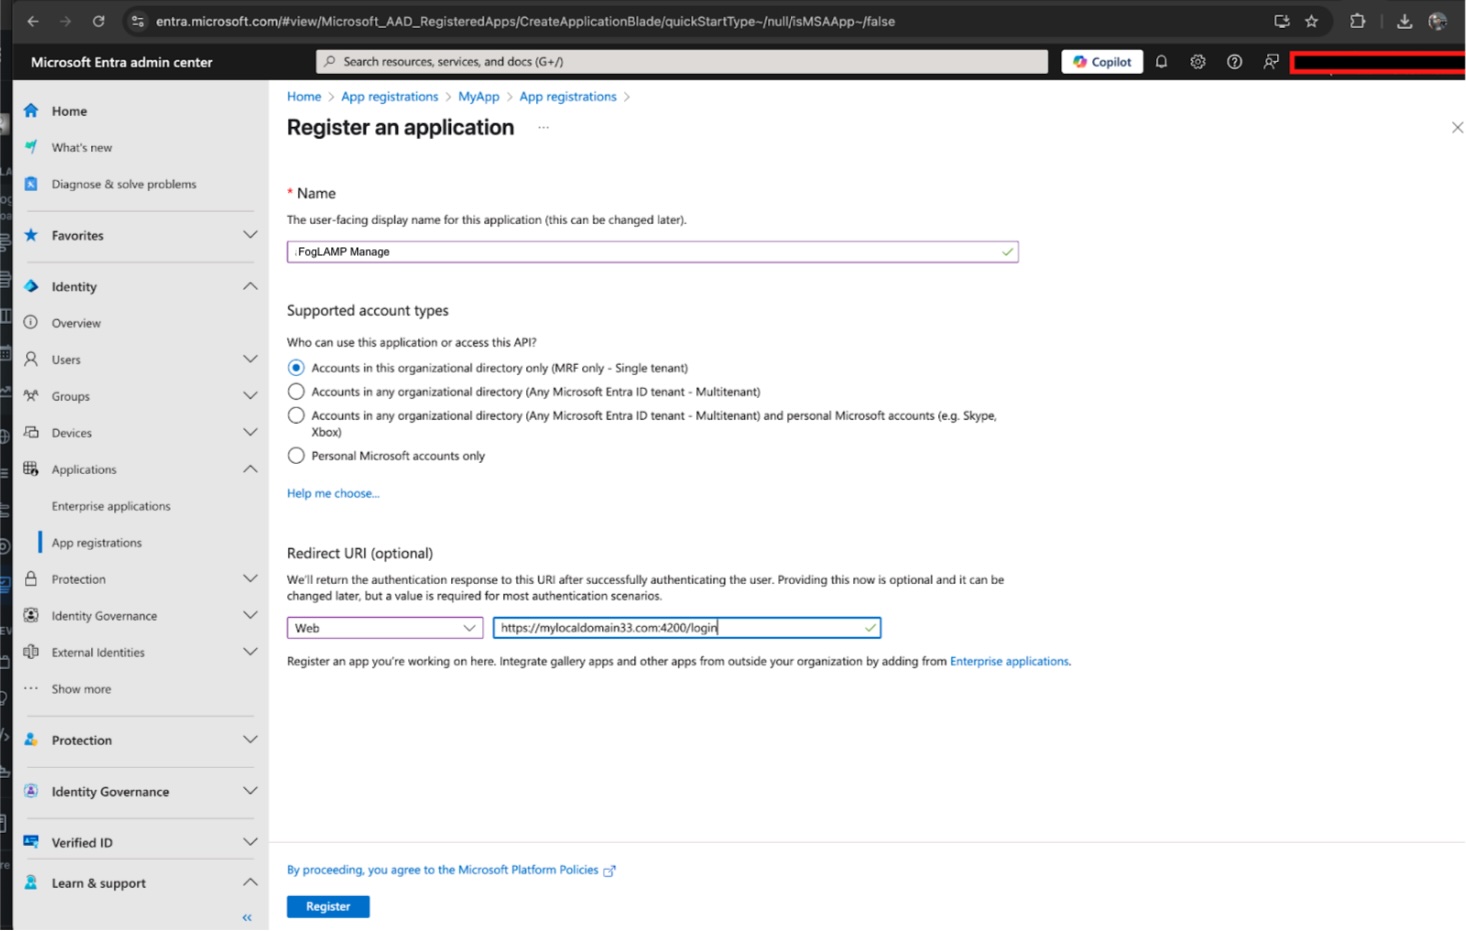
Register FogLAMP Manage as a new application
Set the Redirect URL of your new application to be the login URL of the FogLAMP Manage.
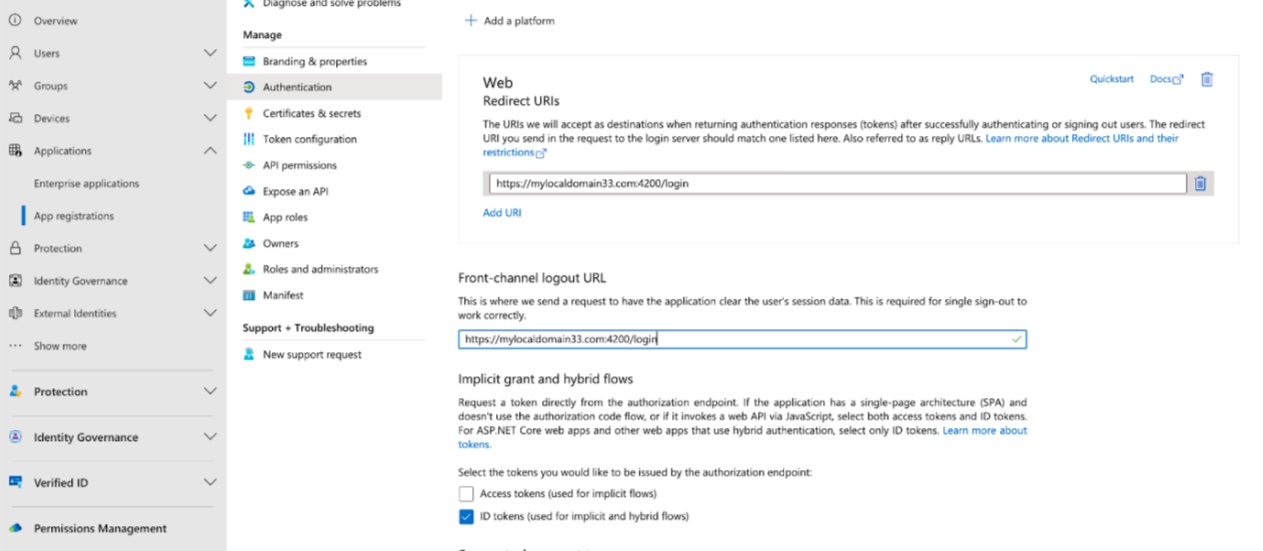
In the Authentication page for your new application set the Front-channel logout URL of your new application to be the login URL of the FogLAMP Manage. In the Advanced settings section of this page make sure that Allow public client flows is set to No.
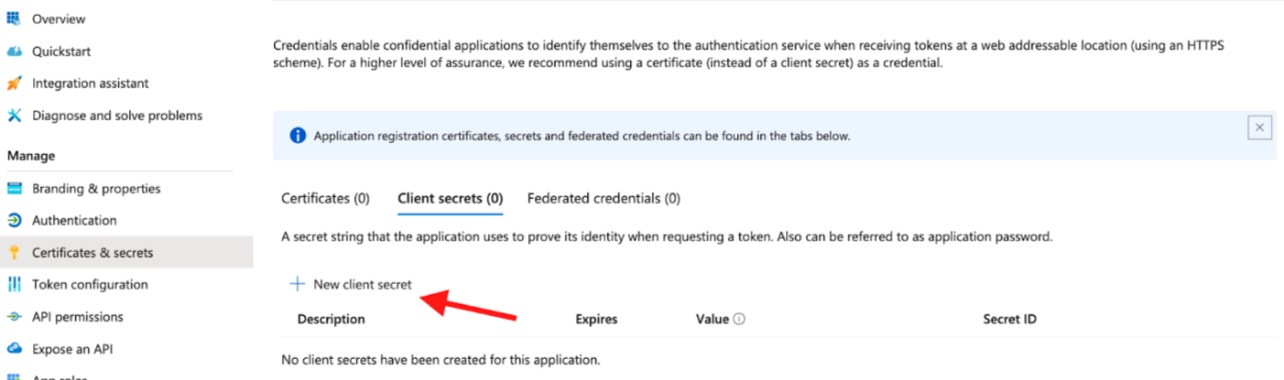
Add a client secret
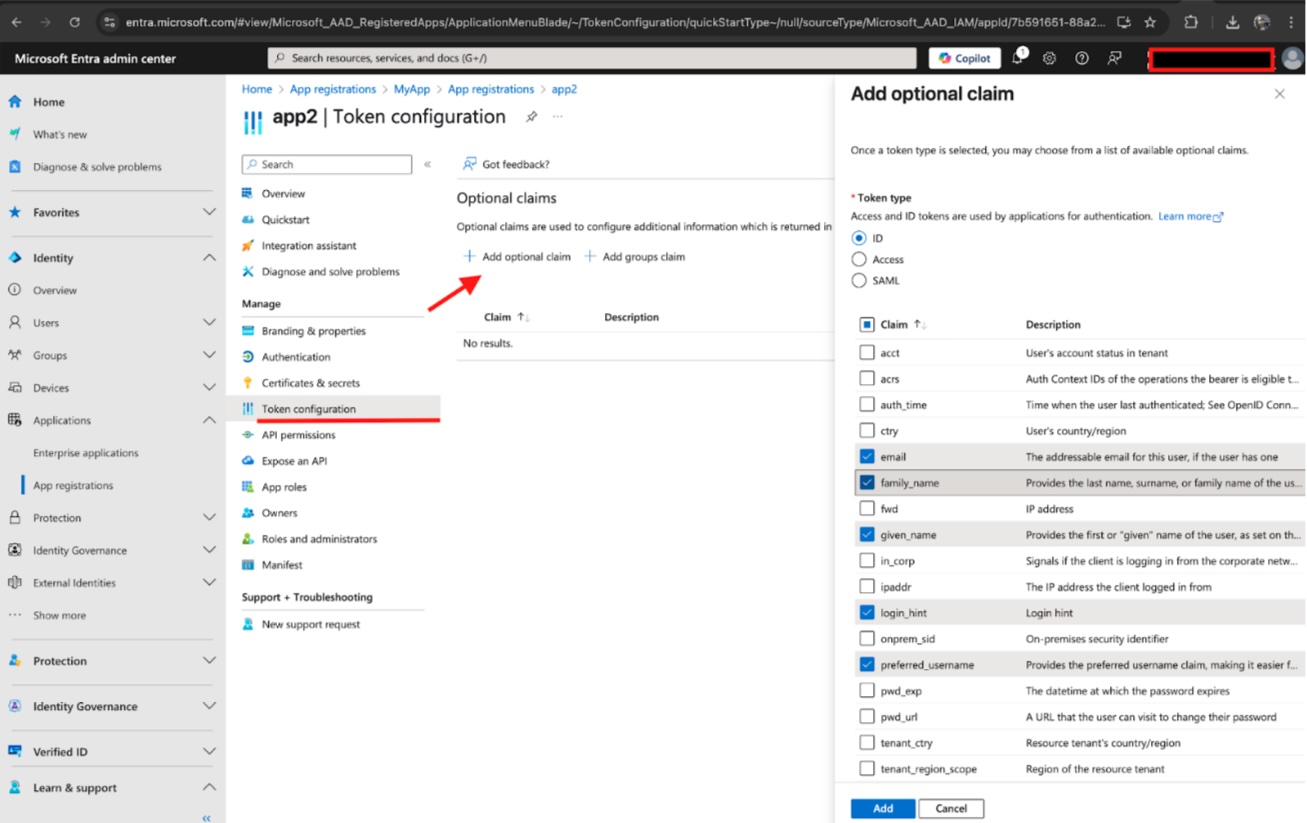
Set the client scope
Retrieve endpoints
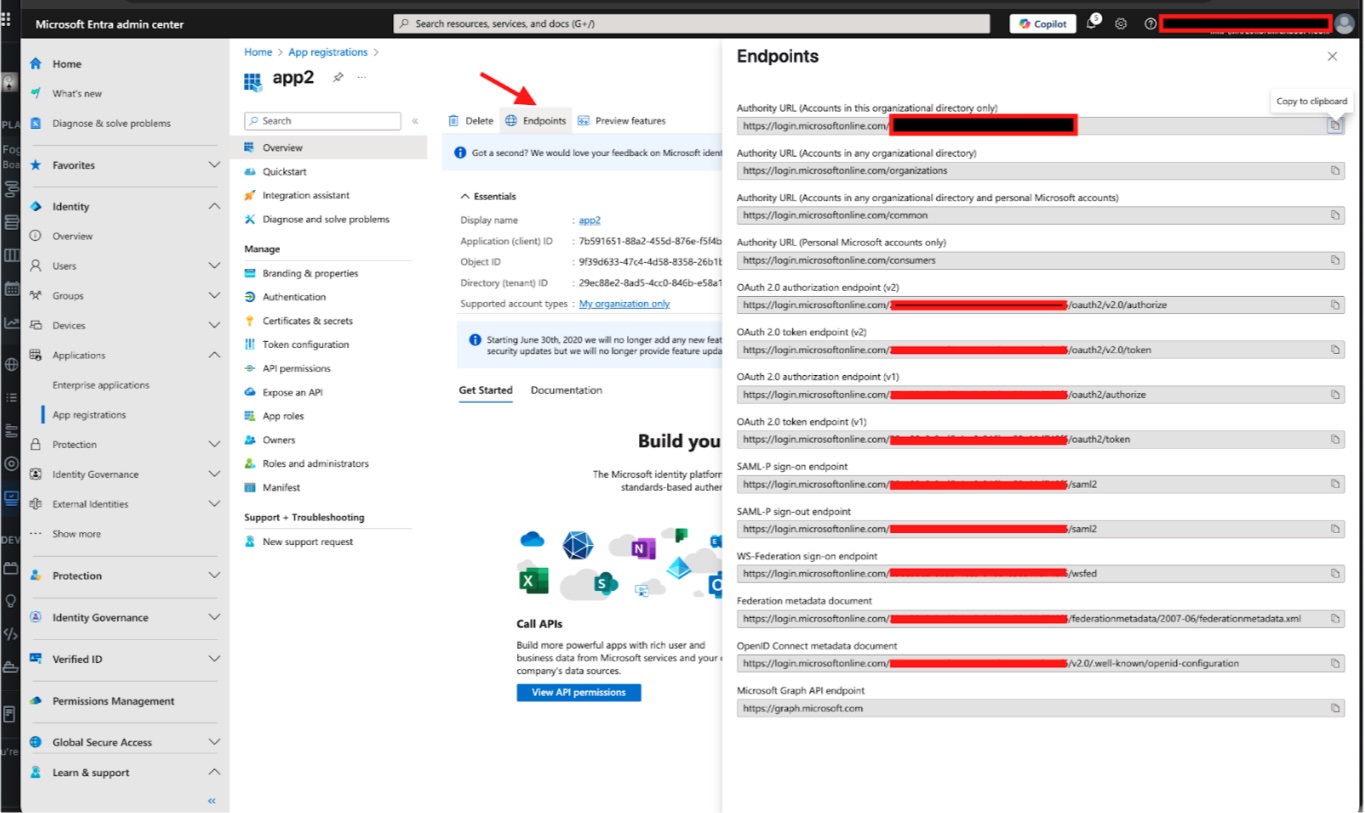
When adding a new Microsoft Entra provider to FogLAMP Manage a dialog will be presented to the user that populates the various URL and other settings needed to connect to Entra.
|
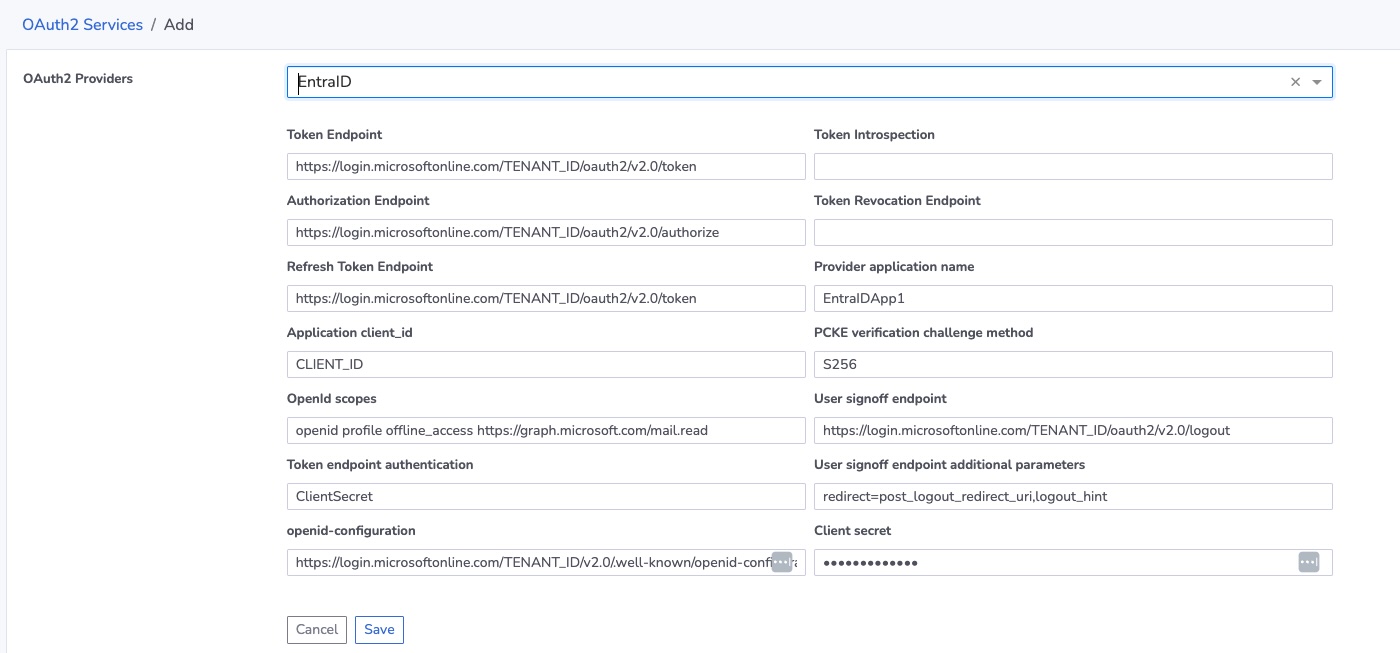
The URLs are pre-populated with values that contain placeholders that need to be replaced with the tenant ID of the tenant you are using. Replace the string TENANT_ID with your tenant ID.
In addition a few fields need to be supplied
Application client_id - Replace this with the client ID you created for your FogLAMP Manage application.
Provider application name - Enter the name of the application as you supplied it to EntraID.
Client secret - insert the client secret you created for this application.
Google
A number of steps need to be taken in Google Cloud before FogLAMP Manage can use Google as an OAuth2 provider. Navigate to your Google Cloud Console home page.
Create a new project or edit an existing project.
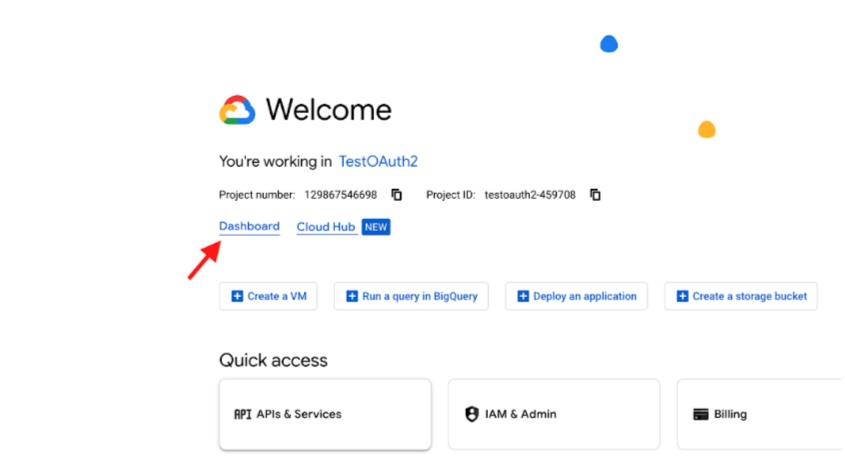
Once created or selected click on the Dashboard link.
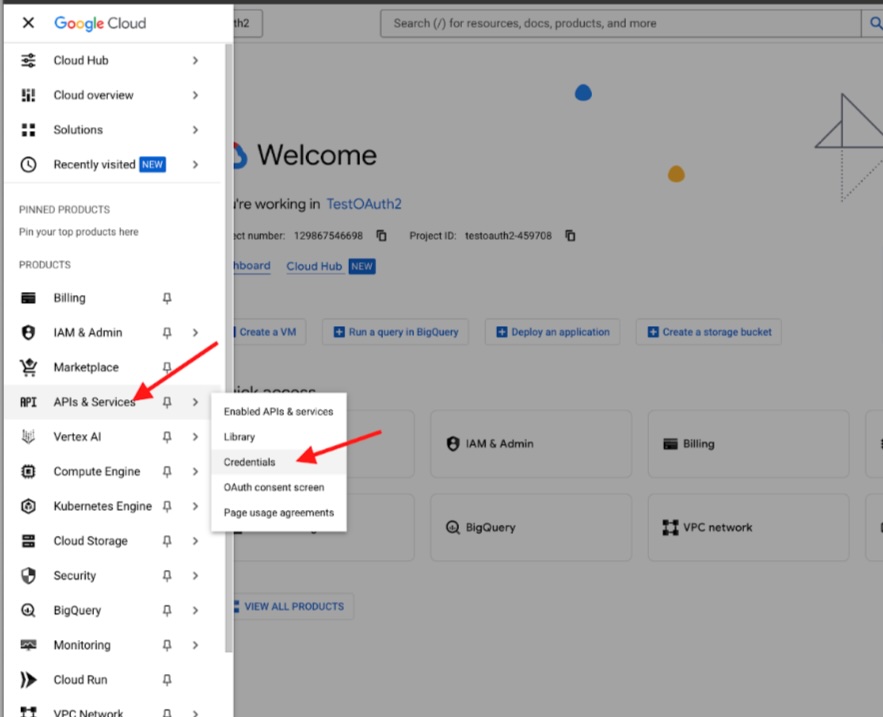
Select the API & Services item in the menu and the Credentials item below that
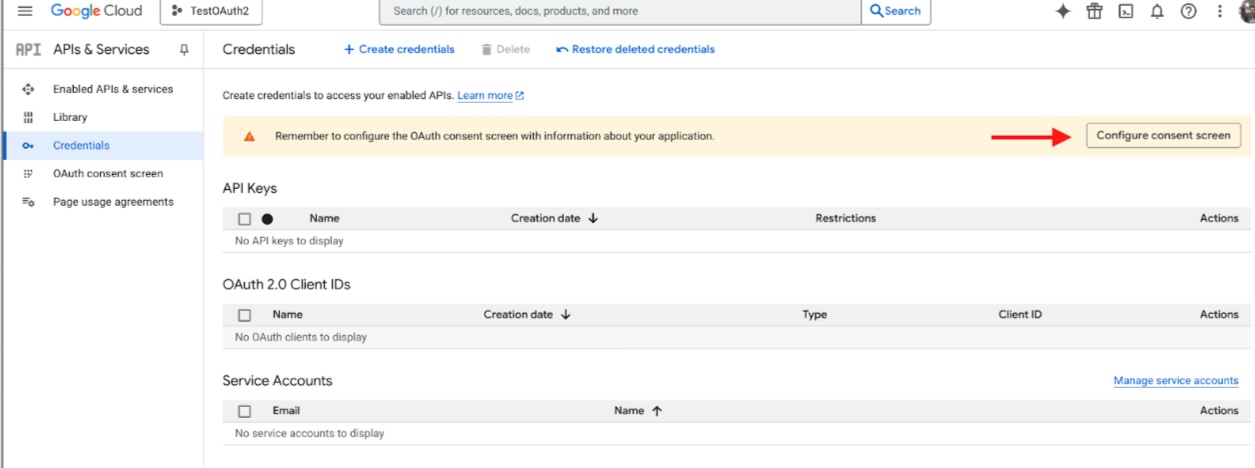
Click on Configure consent screen
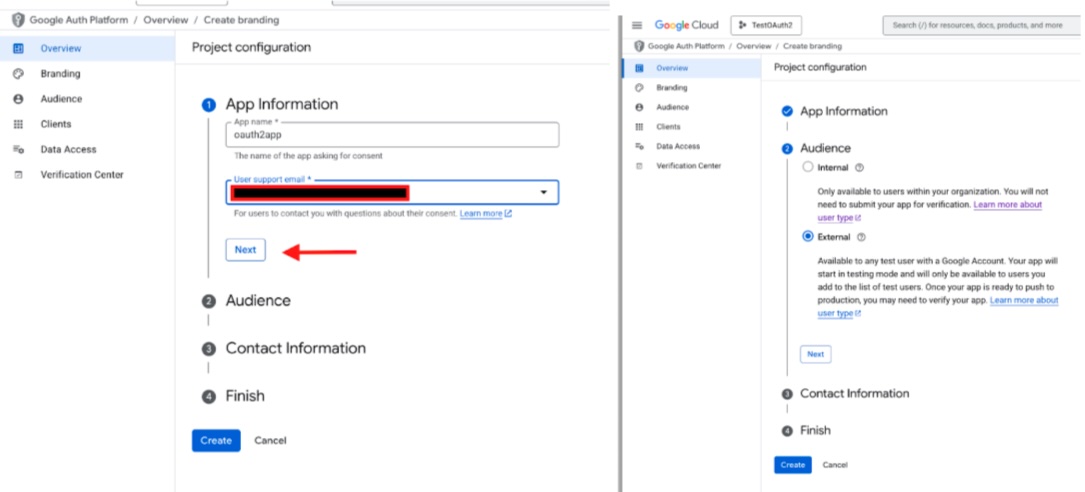
Enter a name, user support email address and select External as the audience
Enter an email address in the Contact Information, agree to the terms and click Create.
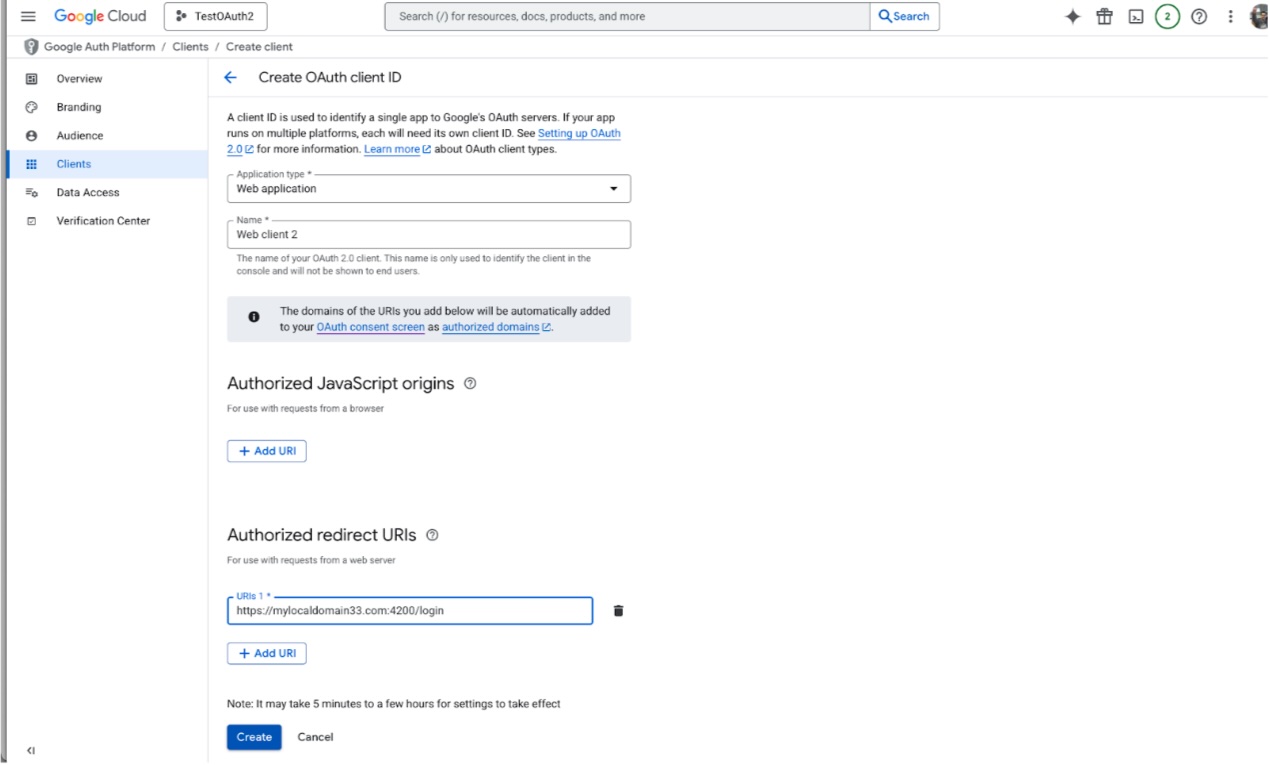
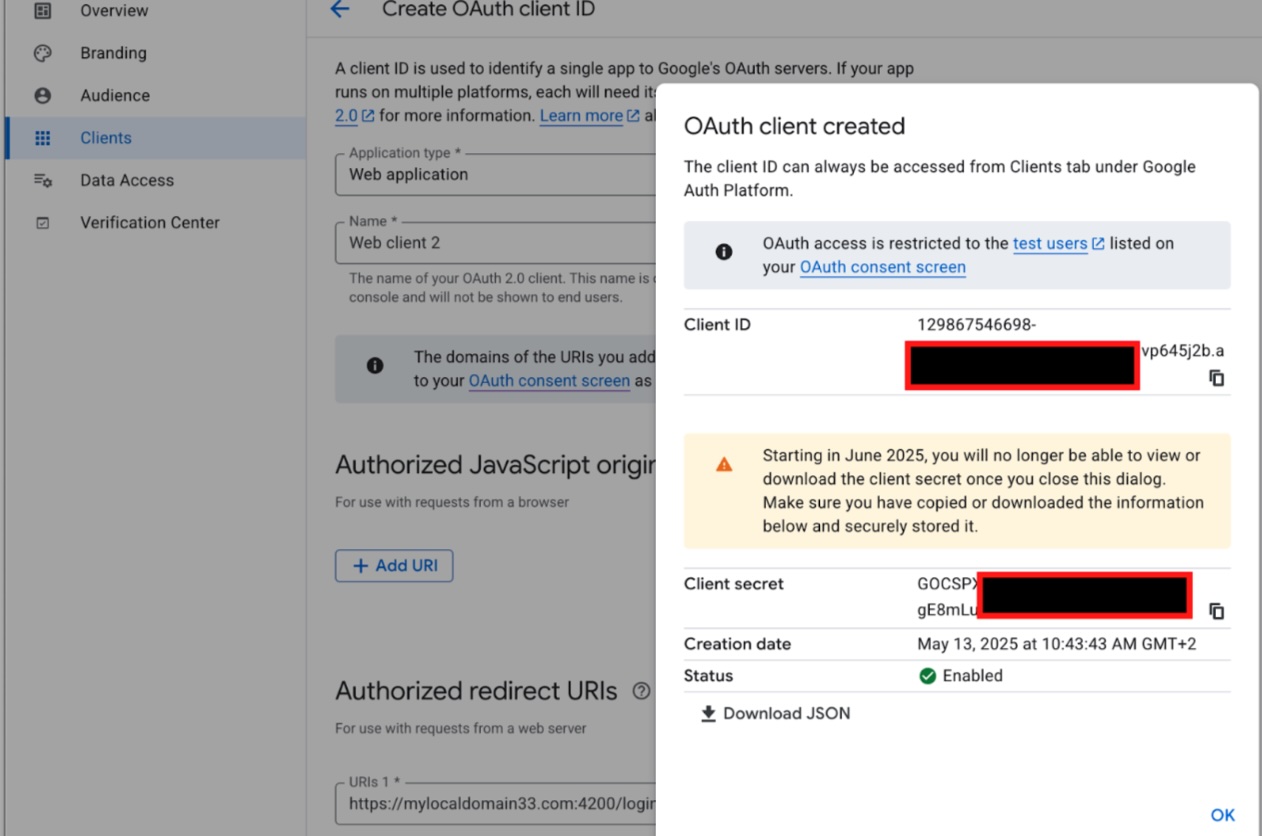
Now create the OAuth client by clicking on the Create OAuth2 client button.
Select the Application type as Web application, enter a name for the client and the FogLAMP Manage login URL as the Authorized redirect URL.
Click on Create
Once created copy the Client ID and the Client secret for later use in the FogLAMP Manage configuration
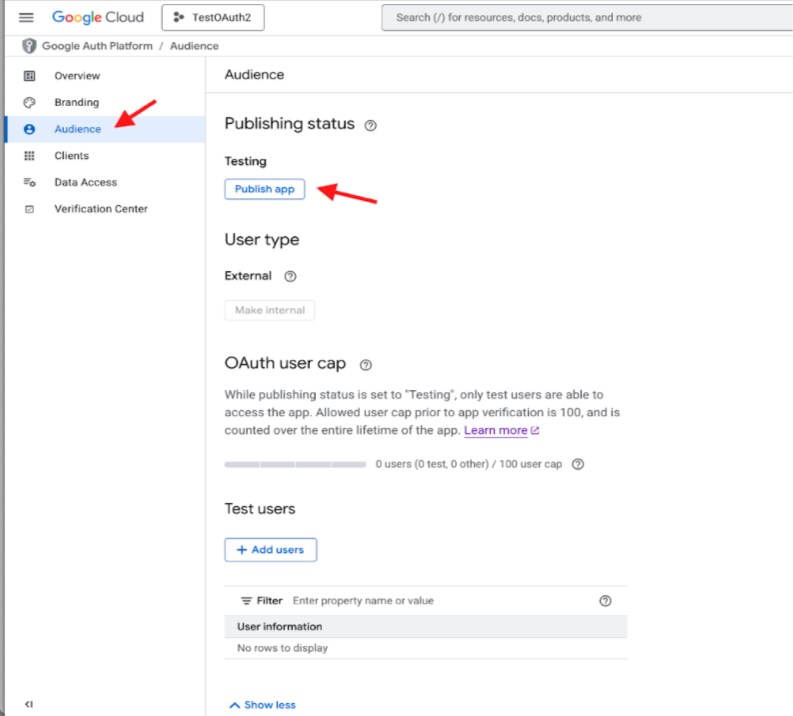
Now publish the new application from the Audience screen by clicking on the Publish app button.
Confirm the publication.
Move to FogLAMP Manage and add a new OAuth2 Provider and select a type of Google. A screen will appear in which to populate the Google information needed in FogLAMP Manage.
|
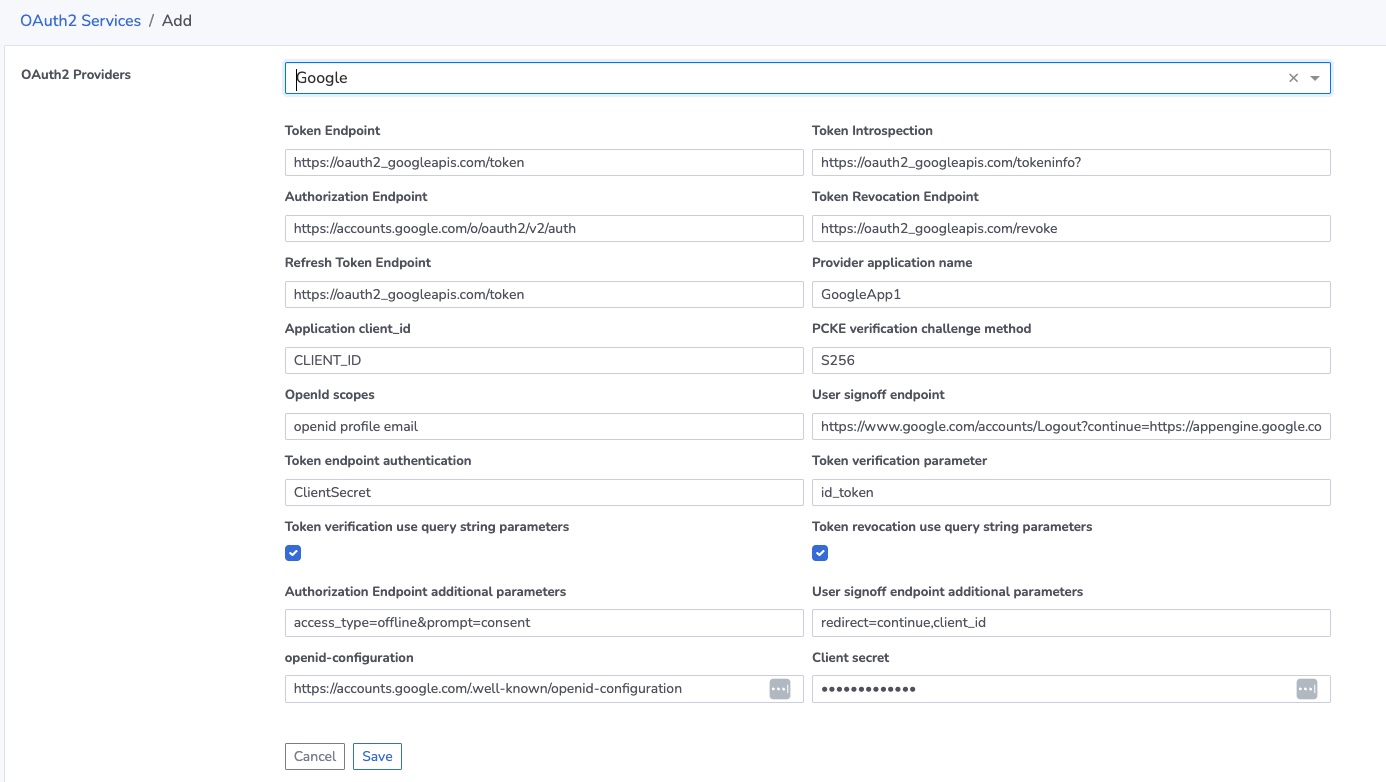
Many of the fields have been pre-populated, a number will need information either added by you in the above set of steps or entered by you in those steps.
Provider application name - enter the application name you provided to Google.
Application client_id - enter the Client ID returned by Google when you created the client.
Client secret - enter the Client secret return by Google when you created the client.
Click on Save to add Google as an OAuth2 provider for FogLAMP Manage.
PingIdentity
A number of steps are required within PingIdentity before you can configure FogLAMP Manage to use PingIdentity as an OAuth2 provider. Open the PingIdentity Console in a browser, sign on and the follow the steps outlined below.
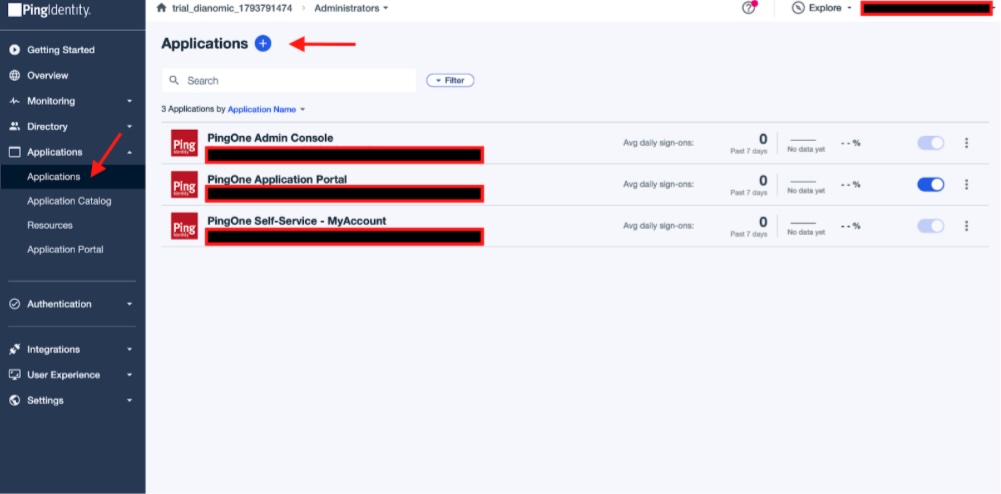
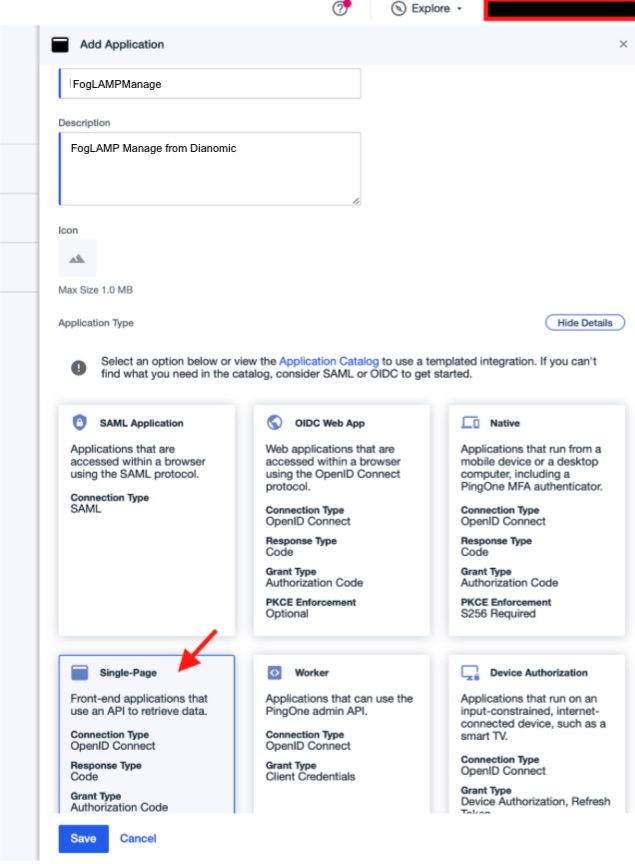
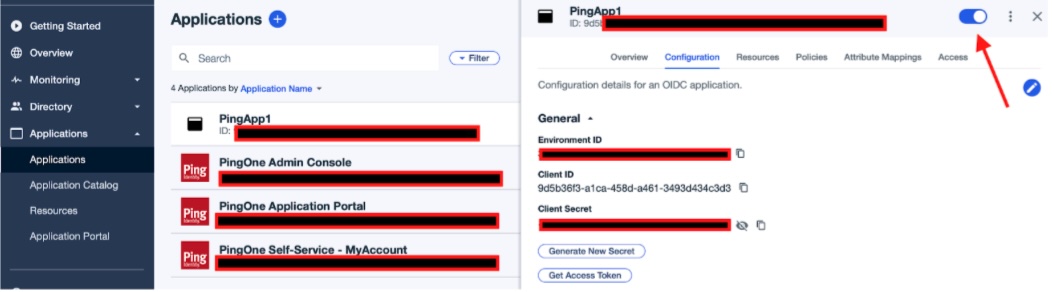
Create a new application for FogLAMP Manage
Enter a name and description for the FogLAMP Manage application
Select Single-Page in the Application Type selection and click on Save.
Note the Environment ID, Client ID and Client Secret for later entry to FogLAMP Manage.
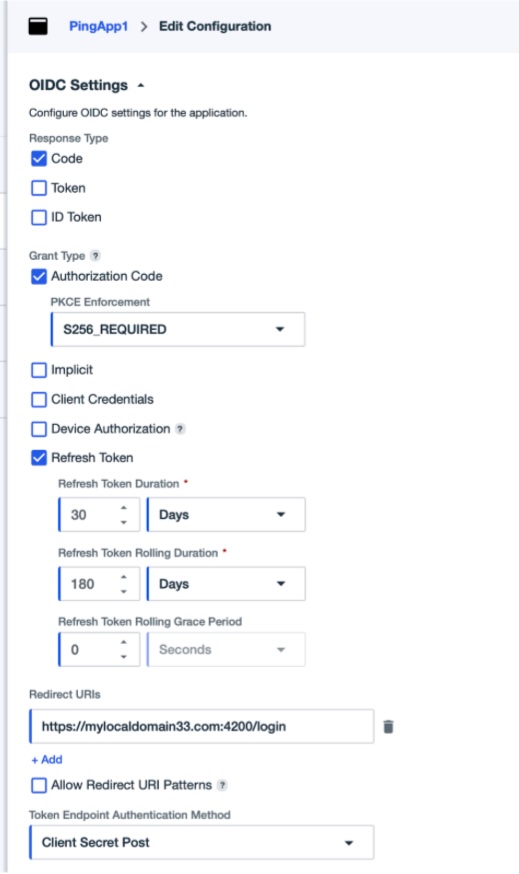
Click on OpenID Connect button.
Set the OIDC Settings with
Response Type of Code
Authorization Code of S256_REQUIRED
Set the Refresh Token parameters you desire
Enter the FogLAMP Manage login URL as the Redirect URIs
Set the Signoff URLS to be the FogLAMP Manage login URL
Click on Save
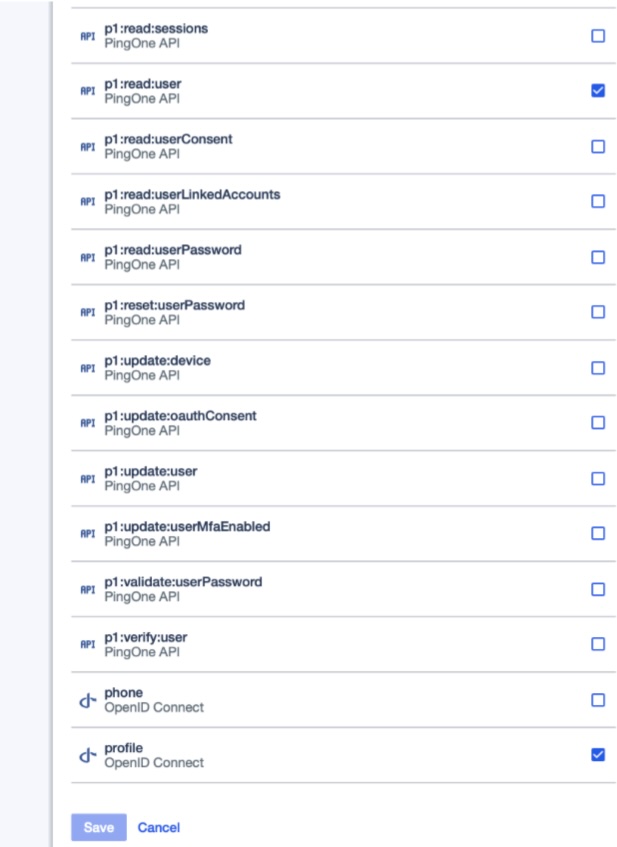
Click on the Scopes button
Select select p1:read:user and profile to be on and all others off
Click on save
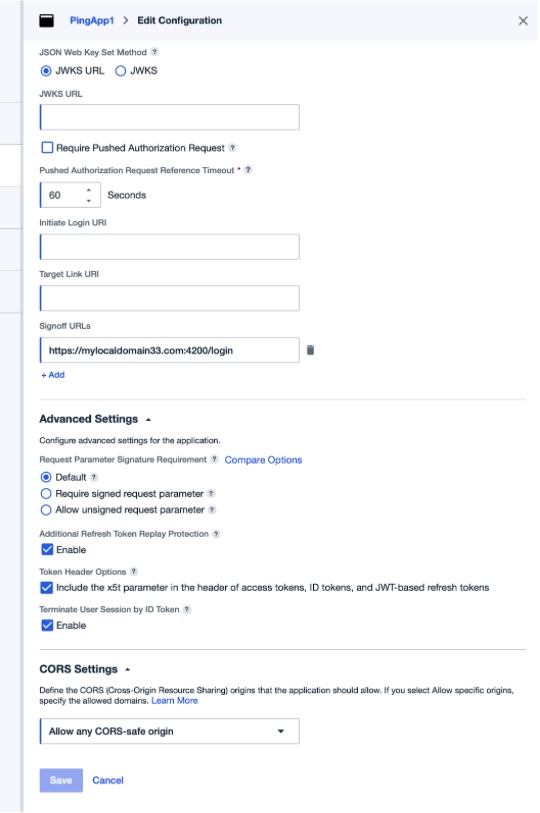
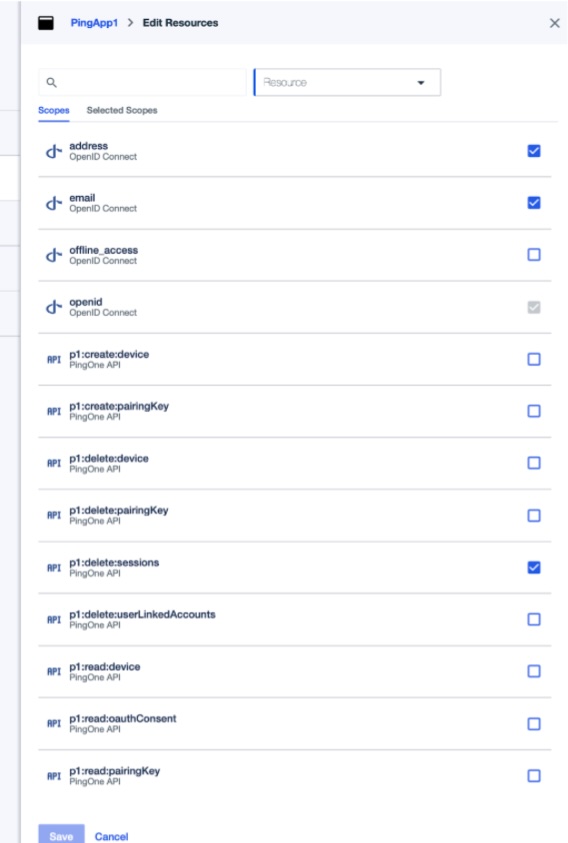
Edit the resources
The address, email and p1:delete:sessions options should be on and all others should be off. The openid item is on and disabled on this form.
Save these options
Now make the new FogLAMP Manage application live

You may now switch to FogLAMP Manage. Add a new OAuth2 provider and select the type of this provider to be PingIdentity.
|
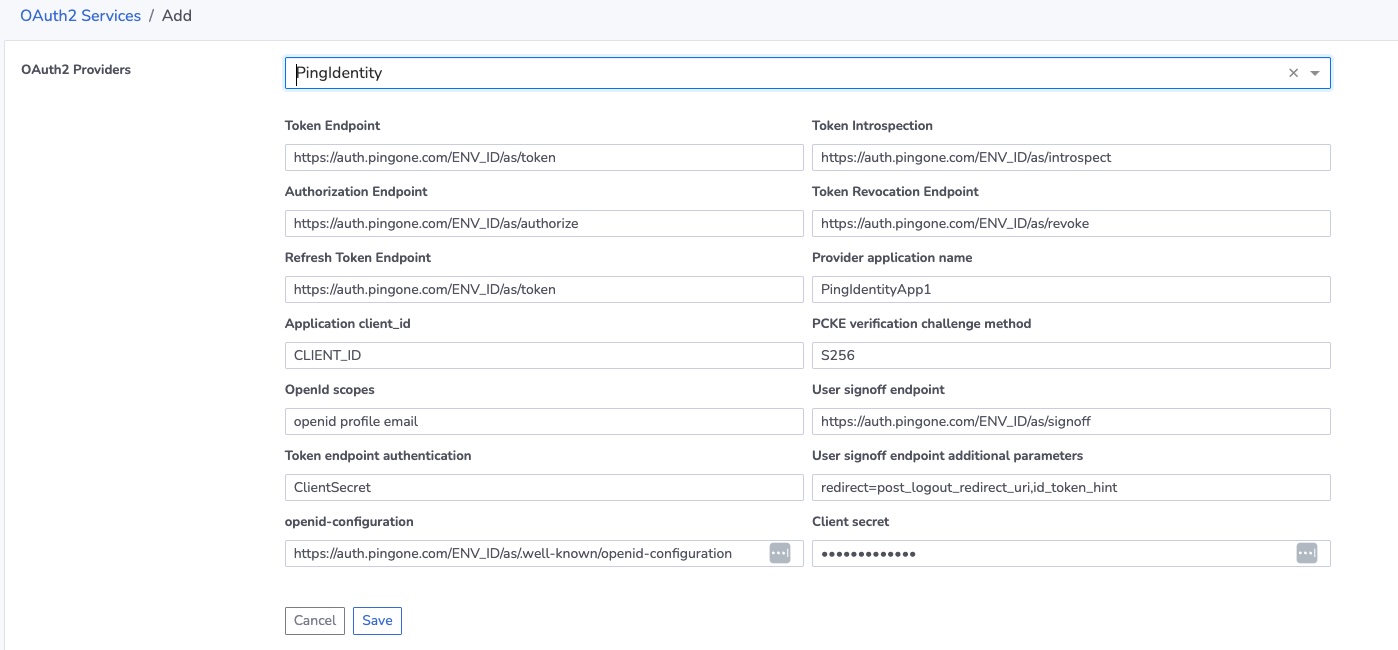
The above dialog will now appear and can be populated with the data noted during the procedure described above.
Note
The examples shown in the documentation use the auth.pingone.com host, this may differ for the particular region in which you are setting up authentication with PingIdentity. If you have a different host domain then you will need to update references to auth.pingone.com to the correct hostname in your region.
Provider application name - this is the name of the application you configured in PingIdentity.
ENV_ID - replace this placeholder text with the environment ID provided by PingIdentity in all the URLS in which it appears.
Application client_id - set this to the client ID provided by PingIdentity.
Client secret - enter the client secret returned by PingIdentity.
Click on Save.
PingIdentity can now be used as an OAuth2 provider to allow login to FogLAMP Manage.